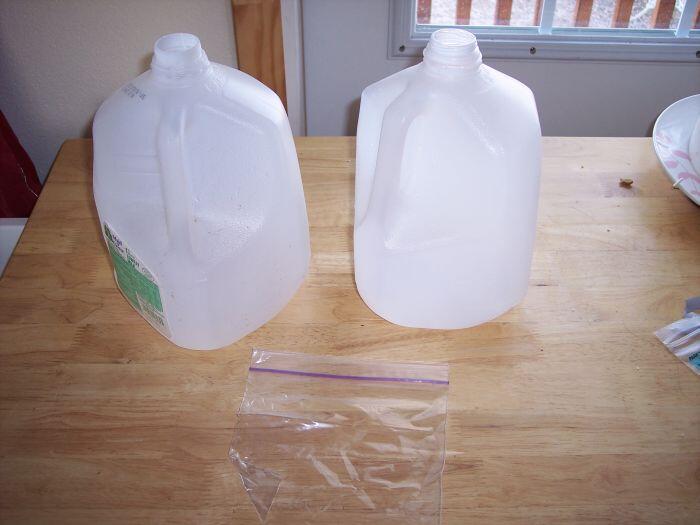
Last time I talked about what you would need to start Winter Sowing, today, I’ll show you how to set up your containers. I use mostly milk jugs since we go through a lot of milk. When I’ve happened to stumble across those plastic trays that you buy prepared veggies or sandwiches in, I’ve used them. First the milk jugs, and a zipper bag. You can use the larger sizes, it depends on how many seeds you want to sow.
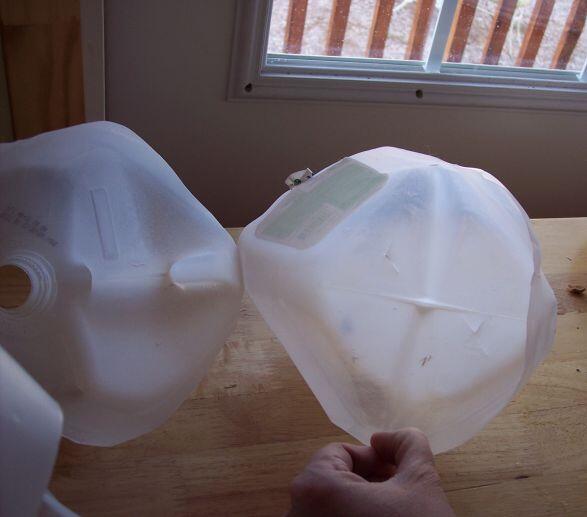
 Then I cut the jugs just below where the handle starts. This gives me several inches for dirt. Whatever container you use, make sure there is at least two inches of dirt, and a couple of inches of headroom for the growing plant. You don’t want it to press up against the top of the container when it starts growing.

Clean out your container, if it had something in it before and make sure to cut drainage holes in the bottom. In the spring you’ll have to start adding water periodically, and you won’t want to drown your seedlings. Then add whatever growing medium you’ve chosen to the container and plant the seeds.
With larger seeds, you can plant them separately through the bottom of your container, with smaller ones, you may find it easier to broadcast many across the surface and cover them with a light layer of dirt. The general rule of thumb is twice as much dirt as the size of the seed, so if it is really tiny, barely covering it is sufficient. If your dirt, compost or whatever else you choose to use is dry, make sure to let it soak up some water before you add it to your container. Potting soil is notorious for being difficult to make wet once it has thoroughly dried, and it’s best for your seedlings if the medium is damp.
When your seeds are planted, seal the container sides with tape, and make sure you have the lid screwed onto the milk jug. In the spring once the seedling start to sprout, you’ll want to be able to add water through the top and to remove it on warm days so you don’t bake your new babies.
Then find an area of your yard that gets six or more hours of sunlight every day and set them out. You may want to put it somewhere that your neighbors won’t see it if you’re concerned about odd questions. There’s nothing else to do until spring when the seeds start to sprout.
Almost any container can be used for this. When I’ve had sandwich trays–the big kind you get for parties–I’ve used newspaper cups in them, which is great for the new plants since it doesn’t disturb their roots. Simply cut newspaper into five- or six-inch strips, and roll it around a cup. fold the bottom in so it will form a cup, and I like to place a piece of tape on it to hold it closed. Fill with soil and continue on like any other container. Before I plant these, I pull the tape off the bottom and loosen the newspaper from the bottom to allow the roots to grow out. Most newspapers are using vegetable inks for all of their printing, even the color pages. If you aren’t sure, only use the black ink pages, or call your local paper and find out what kind of inks they are using. The old colored inks had heavy metals in there and you don’t want to put those in your garden. Also, only use regular newsprint, never use glossy pages as they don’t decompose well and can cause problems. A newspaper cup is a great, eco-friendly, and free replacement for peat cups or pellets.
Now, anyone who posts a comment on this thread will be entered to win free seeds to start their own winter sowing. I guarantee at least a 20% chance of winning, which means that if I get more than five comments, two people will get seeds, and eleven or more comments and I’ll send out three.

Heather,
This is a really interesting concept. Do the seeds have to be pretty winter tolerant? In other words, I don’t suppose we can start tomatoes this way?
That’s a really neat idea. I bet John would like to try it out. He keeps telling me every year we need to start our own garden. Just before the weather got cold, I ripped out all the stuff in the area where we wanted to try to start our garden in the spring. Wish us luck!
Heather,
I’ve always wanted to try this but wasn’t sure how. Thanks for the great tips! 🙂
You’re welcome ladies, and actually Cindy, you can winter sow tomatoes. They won’t start to sprout until spring anyway, so this works great. it may not start them quite as soon as starting them in a windowsill in the spring, but they generally are stronger plants that don’t stress out as much when you transplant them.